
Table of Contents
- How to Maintain Vehicle Wraps: The Basics That Decide Longevity
- How to Wash a Wrapped Car: A Step-by-Step Routine
- Best Products for Cleaning Vinyl Wrap (and What to Avoid)
- Can You Take a Wrapped Car Through a Car Wash?
- Removing Bird Droppings, Insect Residue, Tree Sap, and Road Salt
- How Long Do Car Wraps Last? Maintenance Schedule and Lifespan Expectations
- Care by Wrap Finish, First-Wash Timing, and Damage Diagnosis
- Frequently Asked Questions
Last Updated: October 19, 2026
How to Maintain Vehicle Wraps: The Basics That Decide Longevity
Most vehicle wraps don’t fail because of bad vinyl. They fail because of bad habits. Learning how to maintain vehicle wraps comes down to a few repeatable rules, and the payoff is years of extra life from your graphics.
Here’s the core principle: a vinyl wrap is a thin film sitting on top of your paint. It has no clear coat of its own.
That single fact explains almost every rule in this guide.
Treat your wrap like a high-end paint finish, not like bare metal. Gentle products, frequent washing, and quick cleanup of contaminants do more for longevity than any single product.
How to Wash a Wrapped Car: A Step-by-Step Routine
Wash a wrapped car by hand, in the shade, using two buckets, a pH-neutral soap, and microfiber tools. Rinse first, wash top to bottom, rinse again, then dry with a clean microfiber towel.
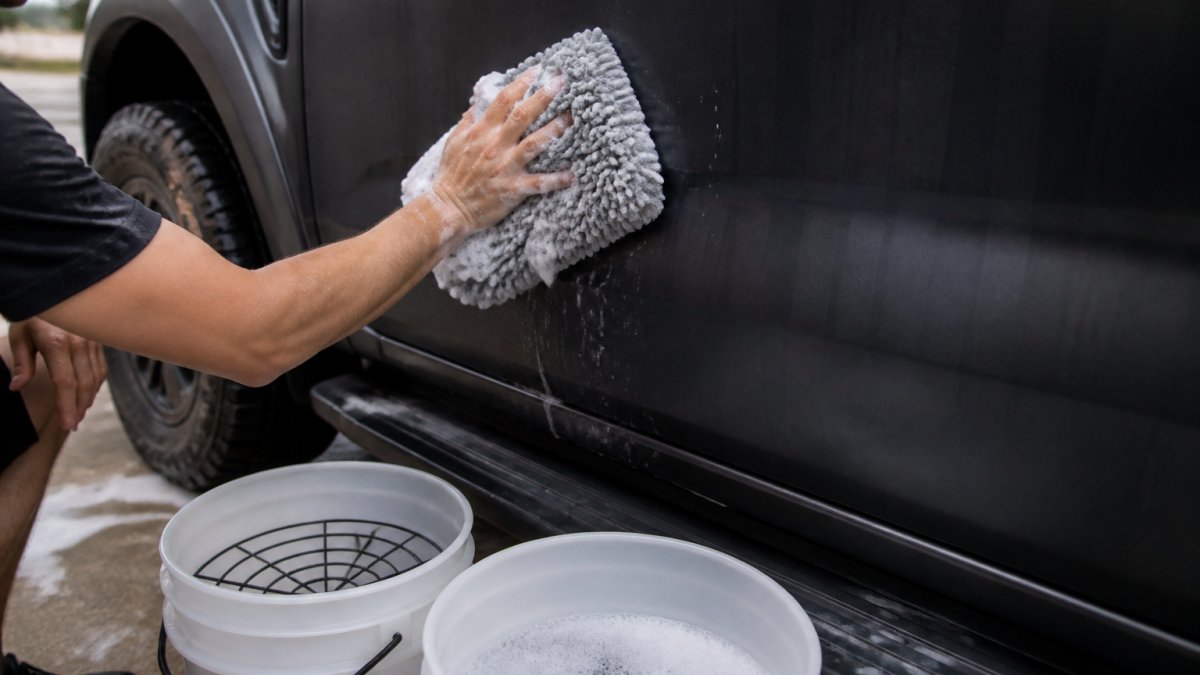
Here’s the routine we recommend:
- Park in shade and let the surface cool.
- Rinse the whole vehicle to lift loose dirt.
- Fill two buckets: one with soapy water, one with clean rinse water.
- Wash one panel at a time with a microfiber mitt.
- Rinse the mitt in the clean bucket before reloading with soap.
- Rinse the vehicle top to bottom.
- Dry with a clean microfiber towel or blower.
How often should you wash a wrapped vehicle? Every two weeks for daily drivers, and weekly if you park near trees, construction, or the coast. Regular washing is the cheapest wrap maintenance there is.
The Two-Bucket Method and Wrap-Safe Wash Tools
The two-bucket method keeps grit out of your soap bucket. Dip your mitt in soap, wash a panel, then rinse the mitt in the clean water bucket before reloading. That one step stops dirt from being dragged back across the vinyl.
Wrap-safe tools:
- Microfiber wash mitts, not sponges
- Two separate buckets with grit guards
- A soft detailing brush for edges and badges
- Microfiber drying towels, kept separate from wash towels
Avoid abrasive tools entirely: no scrub brushes, no scraper blades, no rough shop rags.
Best Products for Cleaning Vinyl Wrap (and What to Avoid)
The best products for cleaning vinyl wrap are pH-neutral automotive detergent, a quick detailer labeled wrap-safe, and isopropyl alcohol diluted for spot work. Anything with abrasives, harsh solvents, or petroleum distillates can dull the vinyl finish or soften the adhesive underneath.
What to use:
- pH-neutral car soap
- Wrap-safe quick detailer for light dust
- Diluted isopropyl alcohol for spot cleaning
- Microfiber towels, soft cloths, and gentle automotive sponges
What to avoid:
- Brush wash soaps and degreasers
- Compounds and polishes (they abrade the film)
- Harsh chemicals like acetone or lacquer thinner
- Any cleaner not labeled safe for vinyl film
Never use a polisher or rubbing compound on a wrap. It cuts through the film’s surface layer and leaves a permanent dull patch that no cleaner can fix.
Can You Take a Wrapped Car Through a Car Wash?
No. Automatic car washes, especially brush washes, are the fastest way to damage a wrap. The brushes trap grit and drag it across the vinyl, and the high-pressure jets can catch lifted edges.
If you must use an automated option, choose a touchless wash with no brushes, and only after the wrap has fully cured, typically at least a week after installation, and longer in cool weather.
Pressure-Washing Precautions and Safe Settings
Pressure washing is safe if you control the pressure, the nozzle, and the angle. The damage almost always comes from a narrow jet held too close to an edge, not from the washer itself.
Safe pressure-washing rules:
- Pressure: stay at or below roughly 1,200-1,500 PSI. Most consumer electric units run in this range; a gas unit turned down works too. Higher pressure buys you nothing on vinyl except risk.
- Nozzle: use a 25-degree or 40-degree fan tip. Never use a 0-degree pinpoint or a turbo nozzle on a wrapped panel.
- Distance: keep the tip at least 12 inches from the surface, and move to 18-24 inches on matte, satin, and textured films.
- Direction: spray at a shallow angle and sweep with the panel, not straight into seams, edges, corners, badges, or the gaps around lights and mirrors. A jet aimed perpendicular into an edge can lift it in seconds.
- Motion: keep the wand moving. Holding it still on one spot concentrates heat and pressure.
When hand washing is preferable:
- Within the first week or two after installation, while the adhesive is still curing
- Any time you see a lifted edge, bubble, or nick, pressure will make it worse
- On matte, satin, textured, and color-shift films, which show pressure marks and dulling more readily
- Around recently repaired or re-sealed panels
Never aim a pressure washer at a lifted edge to “flatten it back down.” Water forced under the film traps moisture against the paint and can cause corrosion or adhesive failure that a simple re-seal would have prevented.
A common pattern among installers is to recommend hand washing as the default and reserve pressure washing for the lower panels, wheel wells, and undercarriage, areas where road salt and heavy grit collect and where a gentle fan tip does the most good with the least risk to the graphics.
Removing Bird Droppings, Insect Residue, Tree Sap, and Road Salt
Remove bird droppings, insect residue, and tree sap as soon as you spot them. These contaminants are acidic or sticky, and left on the vinyl they etch the surface and stain the finish. Road salt in winter needs a full rinse, including the wheel wells and lower panels, before it dries.
Quick removal guide:
- Bird droppings: soak with soapy water, then wipe gently with a microfiber towel. Never scrub.
- Insect residue: soften with warm soapy water, then wipe.
- Tree sap: use a wrap-safe cleaner or diluted isopropyl alcohol, then rinse.
- Road salt: rinse thoroughly with plain water, then wash as normal.
Keep a spray bottle of wrap-safe quick detailer and a microfiber towel in the vehicle. Cleaning a bird dropping in the first hour takes seconds. Cleaning it a week later can leave a permanent mark.
How Long Do Car Wraps Last? Maintenance Schedule and Lifespan Expectations
A well-maintained vinyl wrap typically lasts five to seven years, and proper care is the biggest factor in where it lands on that range.
| Frequency | Task | Why It Matters |
|---|---|---|
| Every 1-2 weeks | Hand wash with two-bucket method | Removes grit before it scratches |
| As needed | Spot clean droppings, sap, insects | Prevents etching and staining |
| Monthly | Check edges, seams, and corners | Catches edge lifting early |
| Seasonally | Full rinse after winter salt | Stops salt from drying into film |
| Annually | Professional inspection | Catches damage before it spreads |
Wrap lifespan also depends on sun exposure and heat. Parking in shade or a garage slows the fade and wear that sun causes.
Care by Wrap Finish, First-Wash Timing, and Damage Diagnosis
Most care guides treat every wrap the same. In practice, the finish and film type determine which products are safe, how soon you can wash, and how damage should be handled. This section covers the three things generic advice skips: finish-specific care, the curing timeline, and how to diagnose damage before it spreads.
Care by Wrap Finish and Material
Gloss vinyl behaves closest to paint. It tolerates pH-neutral soap, gentle hand washing, and wrap-safe quick detailers.
Matte and satin finishes show smudges, fingerprints, and scratches more than gloss, and they cannot be polished out.
Textured films (carbon-fiber look, brushed metal, and similar) trap dirt in the texture.
Color-shift and specialty films tend to be more sensitive to heat and harsh chemicals.
First-Wash Timing and Curing
Wait about a week after installation before the first wash. The adhesive needs time to cure and bond, and washing too soon, especially with pressure, can lift edges. In cool or humid conditions, installers often extend that window to two weeks.
During the curing period:
- Park in shade or a garage when possible.
- Avoid pressure washing entirely.
- Wipe fresh bird droppings or sap with a damp microfiber towel and wrap-safe detailer, do not wait for the first full wash.
- Watch the edges. Small lifts in the first two weeks are common and usually re-sealable by the installer at no cost.
If an edge lifts early, do not press it back down with your fingers or a tool. Oils from your skin and trapped grit prevent a clean re-bond. Call the installer.
When to Spot-Treat, Repair, or Call a Professional
Damage diagnosis comes down to one question: is the film itself compromised, or is it just dirty?
- Removable contamination: light dust, fresh droppings, small smudges, water spots. Spot-treat with wrap-safe detailer and a microfiber towel.
- Staining: a mark that remains after gentle cleaning but has not broken the film surface. Try a wrap-safe cleaner and diluted isopropyl alcohol; if it persists, it may be permanent and is a cosmetic issue rather than a structural one.
- Scratches: light surface marring may be acceptable on a working vehicle; deep scratches that catch a fingernail have cut the film and will need panel repair or replacement.
- Lifted edges: best handled by an installer. Early lifts are usually re-sealable; lifts that have collected dirt or moisture may require trimming and re-sealing.
- Bubbles or peeling panels: a sign of adhesive failure or trapped moisture. This is a professional repair, ignoring it lets moisture and dirt work under the vinyl and damage the paint underneath.
- Film failure: cracking, crazing, or widespread dulling that will not clean up usually means the film is at the end of its service life and needs replacement.
Photograph any damage when you first notice it, with a date. If the issue is a manufacturer defect, that record makes a warranty claim through the film maker, Arlon, 3M, and Oracal are common brands, far easier to support.
If a panel needs replacement or an edge needs re-sealing, that is a job for a shop with a climate-controlled bay. Outlaw Kustomz handles repairs and re-wraps in our 8,000 sq. ft. climate-controlled facility, backed by manufacturer warranties through Arlon, 3M, and Oracal.
Frequently Asked Questions
Can I use Dawn dish soap on a vinyl wrap?
Skip it for routine washing. Dish soap is formulated to strip grease and wax, and repeated use can dry out the vinyl film and dull its finish over time. Use a pH-neutral automotive detergent instead, mixed at the dilution on the bottle. A dedicated wrap-safe cleaner removes road film without attacking the film itself. If you need a stronger clean for stubborn spots, use a purpose-made bug and tar remover and rinse it off promptly rather than reaching for dish soap.
How soon can I wash a vehicle after getting it wrapped?
Wait at least a week after installation before the first wash. The adhesive needs time to cure and fully bond to the paint, and washing too early can lift edges before the bond sets. During that first week, park in the shade where possible and wipe off any bird droppings immediately with a damp microfiber cloth. After the first week, hand washing with a gentle detergent is safe. Ask your installer for their recommended first-wash date, since some films and finishes need a little longer.
Can you wax or polish a vinyl vehicle wrap?
It depends on the finish. Gloss vinyl can be waxed with a wrap-safe product to add a layer of UV protection and make future washing easier. Matte and satin films should never be waxed or polished, because wax fills the texture and leaves shiny patches that cannot be removed. Never use a machine polisher or abrasive compound on any wrap, since it can burn through the film. For matte finishes, use a dedicated matte detailer instead.
How can I prevent a vehicle wrap from fading or peeling?
Wash regularly to remove contaminants before they bond, park in the shade or indoors when you can, and treat bird droppings and tree sap the same day they land. Avoid automatic brush car washes, which catch edges and cause lifting. Use a wrap-safe soap and skip harsh chemicals and abrasive tools. When you maintain vehicle wraps on a consistent schedule, the vinyl holds its color and adhesion far longer, and any edge lifting gets caught early enough to repair instead of replace.
Maintaining a wrap isn’t complicated, but it is consistent work. Wash by hand, use wrap-safe products, and deal with contaminants fast. When damage shows up, get it fixed before it spreads. Outlaw Kustomz offers full-service design, printing, installation, and repair, plus paint protection film and window tinting to protect your investment. Call (918) 810-3929 to get started.